Contributed Examples#
This chapter constains contributed examples from students enrolled in CBE 60258.
Sections#
- Estimating the Entrance Length of Channel Flow
- Non-Isothermal Packed Bed Reactor
- Solving Fick’s Second Law Using Numeric Integration
- Stochastic Simulation of Chemical Reactions
- Spaghettification of the Magic School Bus
- Alcohol Pharmacokinetics and Blood Alcohol Content % Modeling
- Plotting McCabe-Thiele diagram through computational methods
- Example of Mass Balance Problem in Wastewater Treatment Units
- Filtration of a Yeast Suspension
- Calculating Fraction of Molecular Collisions
Contribution Instructions#
Note: Some of these steps were adapted from another repository. The screenshots show the overall idea but the specifics may be different for our class.
Step 1: Create a GitHub Account#
Keep the username professional and do not include personal identifying information such as your birthday or birthyear.
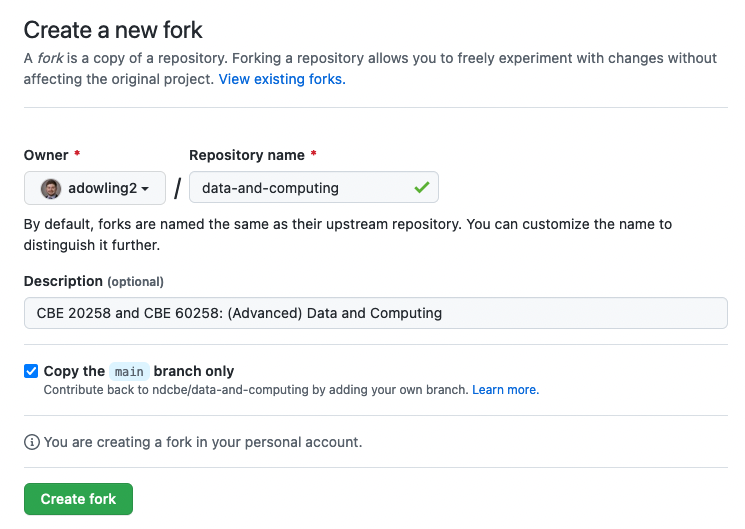
Step 2: Create a Fork in GitHub#
On GitHub for the class repository, find the bottom to create a fork:

Then create a fork under your username. It is best to keep the default settings:

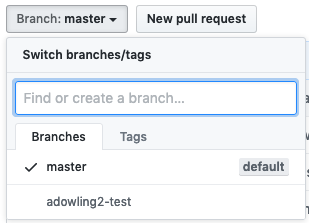
Step 3: Create a Branch in GitHub#
On GitHub, find the drop down box containing “Branch:”.

To create a branch, type a meaningful name such as your project description or your last names. Do not include spaces.
Step 4: Upload your .ipynb File#
First, rename your .ipynb file to contain a few descriptive words. You may use - instead of spaces. For example, Systems-Bio-Regression.ipynb.
Select your new branch from the dropdown menu. Then navigate to the /notebooks/contrib-dev folder and choose the Upload files button.

Step 5: Upload Image Files (Optional)#
Upload any media files you created or modified to the /media folder. Please include both the image (as a .png) and the source file (e.g., .pptx). Use the same interface as the previous step.
Step 6: Create a Pull Request#
On the main class repository, create a pull request (PR) to merge your branch on your fork into the contributed-notebooks branch on the main class repository. After uploading the new notebook file to your branch, you should see an orange/yellow box with your branch name.

Choose Compare & pull request.
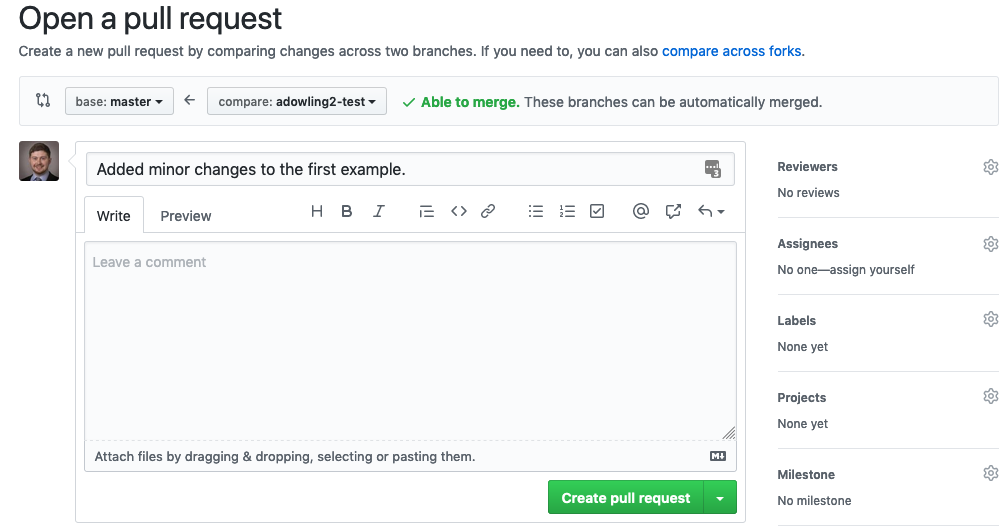
This should take you to a screen with the title Open a pull request:

Make sure you see main <– your branch name. Then add a descriptive comment (what did you change) and click Create pull request.
Tag @adowling2 in the comments of your pull request.
Step 7: Run JypyterBook to Publish to the Class Website#
Professor Dowling will do this step.
