Step 0: Formatting Check
Read the Pyomo Style Guide first and work down its checklist. It covers imports, model-building functions, constraint decorators, checking the solver status, seeding random number generators, the Colab setup cell and the solution markers.
Then follow these tips to make sure your project notebook looks great:
The top of the notebook should be a Markdown cell with
# Informative title here. The title you choose will appear on the class website table on contents. Choose a title that is concise and exciting.Under the title, write
**Prepared by:** Your name (xyz@nd.edu, 2023)you may optionally make your name a hyperlink to your GitHub profile (recommended). If you edited an existing notebook, write**Prepared by:** Prof. Alexander Dowling, Your name (xyz@nd.edu, 2023).Review the tutorial on creating publication quality plots.
Follow the guidelines on code formatting.
Organize your notebook with sections
##and subsections###. Unless really neccessary, do not have subsubsections####, as this looks ugly on the website.Read your notebook carefully for grammar and spelling. Optionally, you can try this experimental spell checker.
If you are creating class excerises, put the solutions (in a code cell) between the comments
### BEGIN SOLUTIONand### END SOLUTION. When I publish the notebooks to the website, a script will automatically remove the answer and replace it with# Add your solution here. See Pyomo Style Guide for how the markers must be formatted.
Step 1: Create a GitHub Account
Keep the username professional and do not include personal identifying information such as your birthday or birthyear.
Step 2: Create a Fork in GitHub
On GitHub for the class repository, find the bottom to create a fork:

Then create a fork under your username. It is best to keep the default settings:
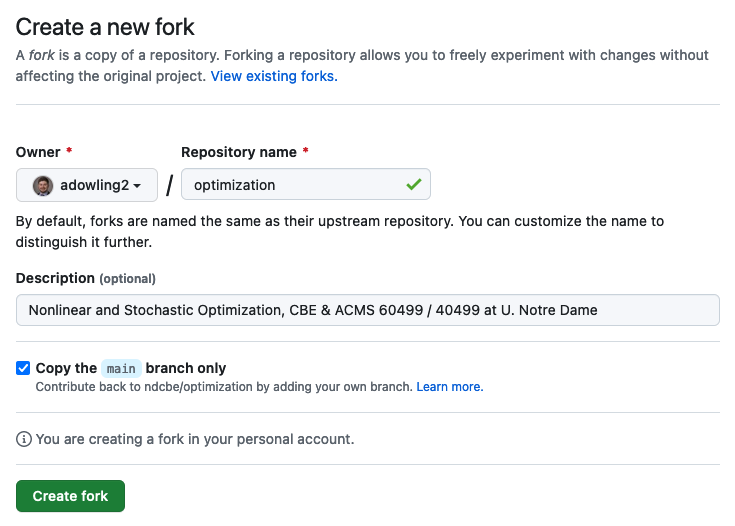
Step 3: Create a Branch in GitHub
On GitHub, find the drop down box containing “Branch:”.
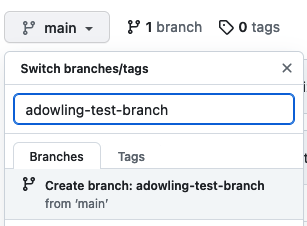
To create a branch, type a meaningful name such as your project description or your last names. Do not include spaces.
Step 4: Upload your .ipynb File
First, rename your .ipynb file to contain a few descriptive words. You may use - instead of spaces. For example, Systems-Bio-Regression.ipynb.
Select your new branch from the dropdown menu. Then navigate to the /notebooks/contrib-dev folder and choose the Upload files button.
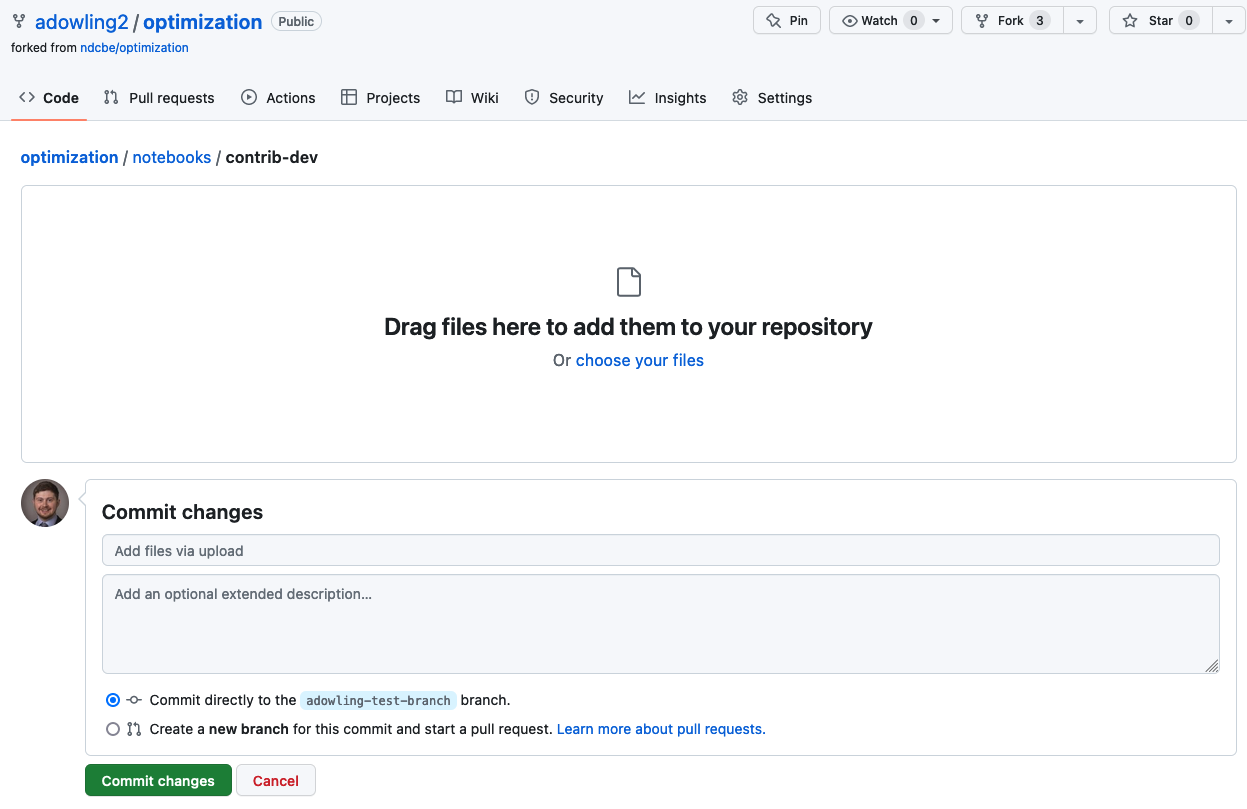
Step 5: Upload any Image Files
First, rename any of your image files (recommended formats: .png, .jpeg, .jpg) to contain a few descriptive words. You may use - or _ instead of spaces. For example, constraint_set_visualization.png.
Select your new branch from the dropdown menu. Then navigate to the /media/contrib folder and choose the Upload files button.
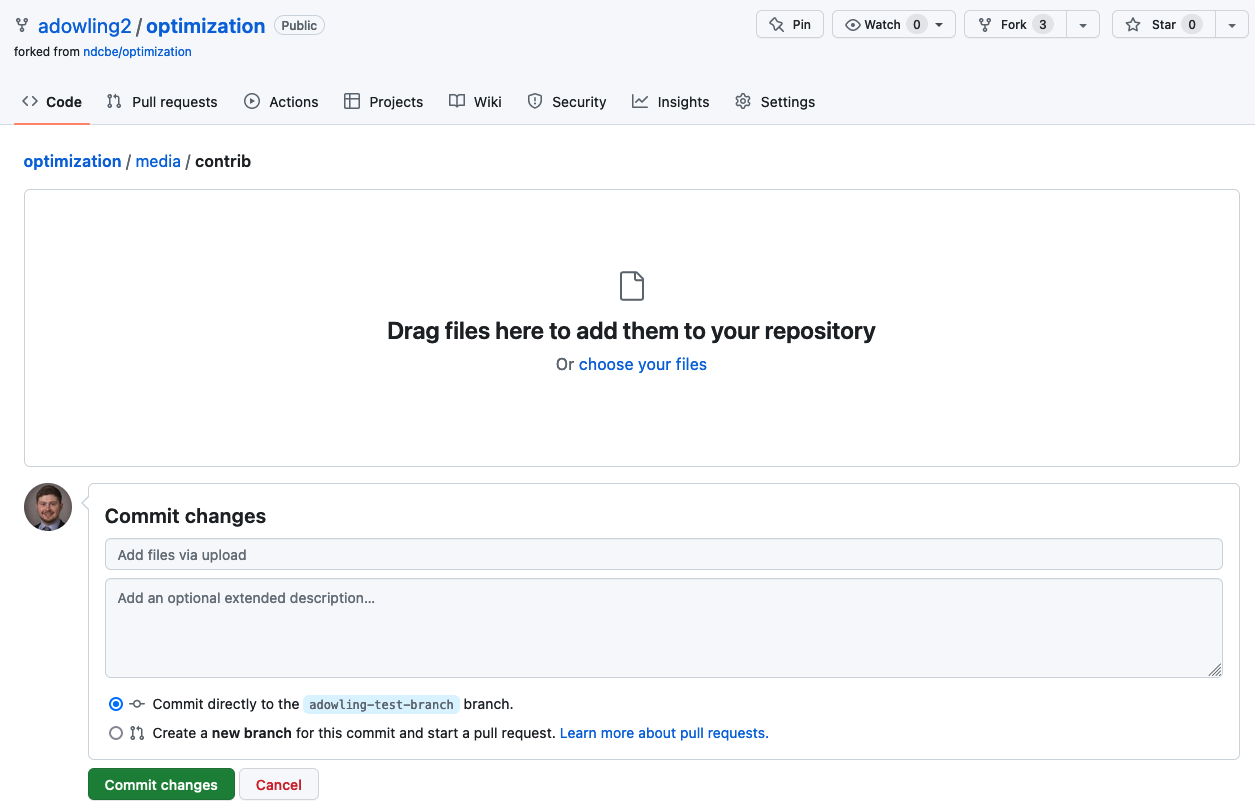
Step 6: Create a Pull Request
On the main class repository, create a pull request to merge your branch on your fork into the contributed-notebooks branch on the main class repository. After uploading the new notebook file to your branch, you should see an orange/yellow box with your branch name.
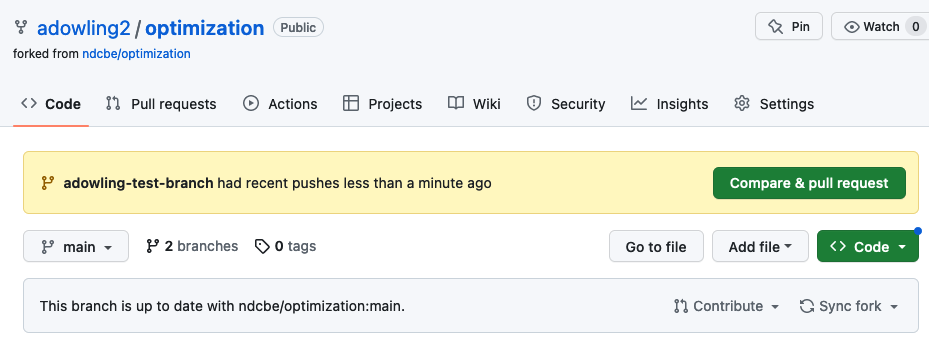
Choose Compare & pull request.
This should take you to a screen with the title Open a pull request:
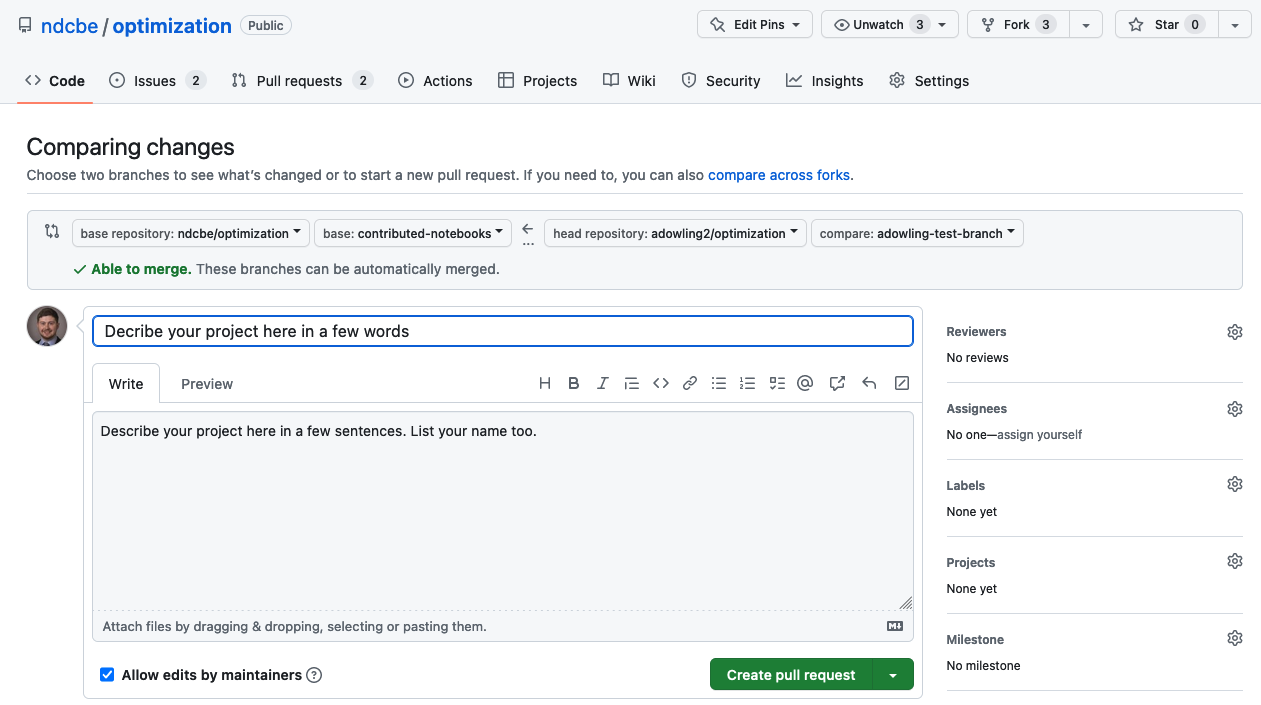
Make sure you see contributed_notebooks in the base repository <-- your branch name in your fork repository. Then add a descriptive comment (what did you change) and click Create pull request.
Tag @adowling2 in the comments of your pull request.
Step 7: Run JypyterBook to Publish to the Class Website
Prof. Dowling will take care of this step.